Homemade Rear Tail Bracket Stepped Washer.
![]()
What Do They Do:There are two of these stepped washers, (one either side) which also act as spacers hence the step. These are required as they are part of the design to house the number plate rear tail bracket securely. The washers are designed to pass through the plastic rear tail number plate bracket which then has a bolt passed through it to secure it in place. The idea of being a stepped washer is that the diameter that fits through the plastic rear tail bracket part is very slightly longer than the thickness of the plastic. This allows the washer to tighten up against the plastic without crushing it but also holding it captive enough so it does not flap about but with enough movement to allow for vibration. |

|

|
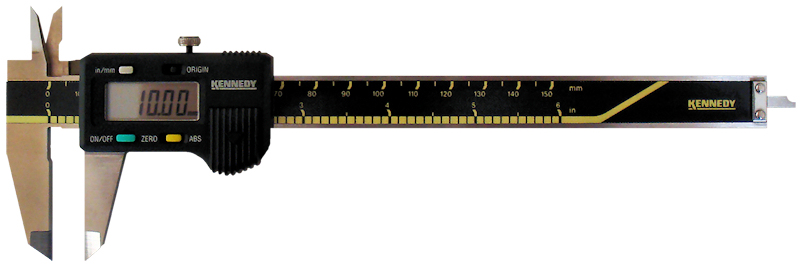
Manufacture:I was not sure what the original stepped washer was made of but it looks like it is a coated mild steel material, (it is definitely magnetic hinting that it is some sort of steel) either way it is certainly not Aluminium or Brass. Opting to use mild steel then to spray paint it to stop it rusting I first removed the remaining washer from the opposite side and measured it with a digital vernier caliper, this should be accurate enough to establish the dimensions for manufacturing a new washer. It was then a simple case of turning up a new one. I made a couple just in case the same problem occurred and I lost stepped washer again. Fitting it was a bit awkward as there is not much room between the exhaust pipes and the rear tail bracket but using a ring spanner and slowly inching the bolt round I manager to fit it without having to remove any other components. |
|
Stepped Washer Diagram & Dimensions.The drawing is a png image!Right click and "Save Picture / Image As" if a copy is required.  |
Tools and materials.This item is very simple to make if you have the tools and materials available, ideally you need the following...1. Diameter 16mm or bigger steel bar or equivalent material about 100mm in length. 2. Number 3 Centre drill. 3. Diameter 6.2mm drill suitable for drilling steel. 4. Metal turning lathe. 5. Digital vernier calipers, vernier calipers or 0 - 25mm micrometer for measuring. 6. Can of black spray paint aerosol. Method. 1. Place bar in a 3 jaw chuck or collet with about 20mm protruding. 2. Turn to diameter 16.0mm for a length of 10mm or so. 3. Face the bar end, centre drill and drill a hole diameter 6.2mm, 10mm or so deep. 4. Turn the diameter 10mm, for a length of 3.75mm attaining a square corner, (a small radius in the corner no bigger than 0.5mm is acceptable). 5. Part off at a length of 5.25mm. 6. Remove burrs. 7. Coat with black spray paint to prevent rusting. |